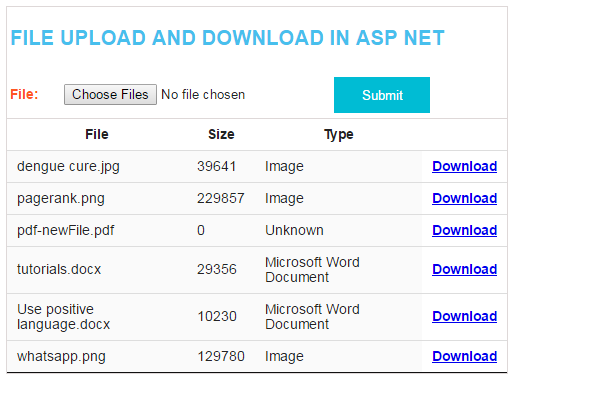
In this I will show you, file upload and download in asp.net MVC with example. Also displaying the number of already uploaded files with details such as fileName , size and file type.
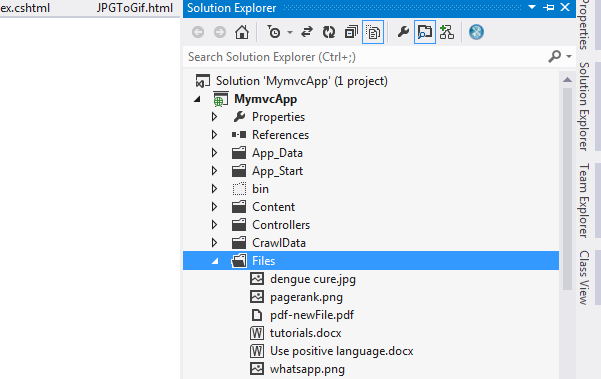
When the user uploads files, it should be uploaded to a project folder on the web server. In my case, I uploaded to the following “Files” folder,
Step 1: Create a asp.net mvc application for file upload and download in asp.net. Create model class and name it as “ObjFile”.Copy and paste the following code.
public class ObjFile
{
    public IEnumerable<HttpPostedFileBase> files { get; set; }
    public string File { get; set; }
    public long Size { get; set; }
    public string Type { get; set; }
}

Step 2: Create a mvc controller,Right click onthe "Controllers" folderand add "Home" controller.Copy and paste the following code.Import the following namespaces System.Data and System.IO.

using System.Data;
using System.IO;

public ActionResult Index()
        {
            List<ObjFile> ObjFiles = new List<ObjFile>();
            foreach (string strfile in Directory.GetFiles(Server.MapPath("~/Files")))
            {
                FileInfo fi = new FileInfo(strfile);
                ObjFile obj = new ObjFile();
                obj.File = fi.Name;
                obj.Size = fi.Length;
                obj.Type =GetFileTypeByExtension(fi.Extension);
                ObjFiles.Add(obj);
            }

            return View(ObjFiles);
        }

        public FileResult Download(string fileName)
        {
            string fullPath = Path.Combine(Server.MapPath("~/Files"), fileName);
            byte[] fileBytes = System.IO.File.ReadAllBytes(fullPath);
            return File(fileBytes, System.Net.Mime.MediaTypeNames.Application.Octet, fileName);
        }

        private string GetFileTypeByExtension(string fileExtension)
        {
            switch (fileExtension.ToLower())
            {
                case ".docx":
                case ".doc":
                    return "Microsoft Word Document";
                case ".xlsx":
                case ".xls":
                    return "Microsoft Excel Document";
                case ".txt":
                    return "Text Document";
                case ".jpg":
                case ".png":
                    return "Image";
                default:
                    return "Unknown";
            }
        }
        [HttpPost]
        public ActionResult Index(ObjFile doc)
        {
            foreach (var file in doc.files)
            {

                if (file.ContentLength > 0)
                {
                    var fileName = Path.GetFileName(file.FileName);
                    var filePath = Path.Combine(Server.MapPath("~/Files"),fileName);
                    file.SaveAs(filePath);
                }
            }
            TempData["Message"] = "files uploaded successfully";
            return RedirectToAction("Index");
        }

    }
Step 3: Right click on the HomeControllers and create an index view. Copy and paste the following code.
@using System.Data;
@modelIEnumerable<ObjFile>
<link rel="stylesheet" type="text/css" href="//cdn.datatables.net/1.10.12/css/jquery.dataTables.min.css" />
<style type="text/css">
    .btn {
        width: 100px;
        height: 40px;
        background: #00BCD4;
        border-style: solid;
        border-color: white;
        color: white;
    }

    .gridborder {
        border-top: 1px solid #DED8D8;
    }
</style>

<div style="border: 1px solid #DED8D8; width: 500px; font-family: Arial;">
    @using (@Html.BeginForm(null, null, FormMethod.Post,
     new { enctype = "multipart/form-data" }))
    {
        if (TempData["Message"] != null)
        {

        <p style="font-family: Arial; font-size: 16px; font-weight: 200; color: red">@TempData["Message"]</p>
        }
        <table>
            <tr>
                <td style="padding-bottom: 5px" colspan="3">
                    <h2 style="color: #47bfed">FILE UPLOAD AND DOWNLOAD IN ASP NET  </h2>
                </td>
            </tr>
            <tr>
                <td style="width: 50px;">
                    <b style="color: #FF5722">File:</b>
                </td>
                <td>
                    <input type="file" name="files" id="files" multiple="multiple" />
                </td>
                <td>
                    <input type="submit" class="btn" name="submit" />
                </td>
            </tr>

        </table>

    }
    <table class="gridborder row-borderhover order-column dataTable no-footer">
        <tr>
            <th class="sorting_asc">
                @Html.DisplayNameFor(model => model.File)
            </th>
            <th class="sorting">
                @Html.DisplayNameFor(model => model.Size)
            </th>
            <th class="sorting">
                @Html.DisplayNameFor(model => model.Type)
            </th>
            <th class="sorting"></th>
        </tr>

        @foreach (var item in Model)
        {
            <tr>
                <td class="sorting_1">
                    @Html.DisplayFor(modelItem=> item.File)
                </td>
                <td class="sorting_1">
                    @Html.DisplayFor(modelItem=> item.Size)
                </td>
                <td class="sorting_1">
                    @Html.DisplayFor(modelItem=> item.Type)
                </td>
                <th class="sorting">
                    @Html.ActionLink("Download", "Download", new { fileName = item.File })
                </th>
            </tr>
        }
    </table>
</div>
Description: Run the MVC application and upload multiple files to a server. The new files will be updated and displayed on the bootstrap grid css class. You can also download the files from the server by click on the download button.